

Cleaning a kitchen faucet's built-in aerator filter (the small screen at the faucet tip) is a quick, DIY task that fixes low water flow, sputtering, or uneven spray-common issues from mineral buildup (hard water) or sediment. Here's a step-by-step guide, including tools, cleaning methods, and reassembly:
1. Identify the Faucet Aerator Type
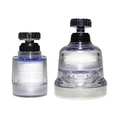
First, locate the aerator-it's the small, threaded cap at the very end of the faucet spout (where water flows out). Most kitchen faucets use one of two types:
* Threaded aerator: Screws directly onto the spout (most common).
* Pull-out/pull-down spray head aerator: Hidden inside the detachable spray head (needs disassembly of the spray head).
2. Gather Simple Tools
Adjustable wrench or pliers (wrap with a cloth to avoid scratching)
White vinegar (or descaling solution for heavy mineral buildup)
Small bowl/container
Soft-bristled toothbrush or small brush
Towel (to catch parts and prevent scratches)
Toothpick or small pin (for clearing tiny screen holes)
3. Step-by-Step Cleaning Process
Part 1: Remove the Aerator
For Standard Threaded Aerators
* Turn off water supply (optional but safe-close hot/cold shut-off valves under the sink, or just turn off the faucet).
* Loosen the aerator by hand: Grip the aerator cap (the ridged end) and twist counterclockwise-most loosen easily by hand.
* Use tools if stuck: If mineral buildup makes it tight, wrap a cloth around the aerator (to protect the faucet finish), then grip with pliers/wrench and twist counterclockwise gently.
* Take apart the aerator: Once removed, the aerator will have multiple small parts (usually: outer cap, one or more mesh screens, a rubber washer/gasket, and a flow regulator). Lay them out in order on a towel to remember reassembly sequence.
For Pull-Out/Pull-Down Spray Head Aerators
* Detach the spray head from the hose (press the release tab on the hose connector, then pull the spray head off).
* Locate the aerator inside the spray head's nozzle tip-some twist off from the outside, others require unscrewing a small cap inside the spray head (use a small screwdriver if needed).
* Remove the internal screen/filter components (same as standard aerators: screens, washers, flow restrictors).
Part 2: Clean the Filter & Components
The goal is to remove mineral deposits (limescale) and sediment from the mesh screens-vinegar is the safest, most effective cleaner for this.
Soak in vinegar:
Fill a small bowl with undiluted white vinegar.
Submerge all aerator parts (screens, cap, washer, flow regulator) in the vinegar.
Soak for 30 minutes to 1 hour (for heavy limescale, soak 2–3 hours or overnight).
Scrub away residue:
After soaking, use a soft-bristled toothbrush to gently scrub the mesh screens and parts-dissolved mineral deposits will wipe away easily.
For tiny clogged screen holes: Use a toothpick or small pin to carefully poke out trapped sediment (do not tear the mesh).
Rinse thoroughly: Rinse all parts with clean, running water to remove vinegar residue and loosened debris.
Part 3: Reassemble & Reinstall the Aerator
Reassemble parts in order: Follow the reverse order of disassembly (e.g., outer cap → flow regulator → rubber washer → mesh screen(s) → screw back into spout). Ensure the rubber washer is seated flat (no wrinkles-this prevents leaks).
Hand-tighten first: Thread the aerator back onto the faucet spout clockwise by hand-do not over-tighten (this can crack the plastic aerator or damage the faucet threads).
Final check: If using tools, only give a gentle 1/8 turn with pliers (wrapped in cloth) to secure-over-tightening causes leaks or breaks parts.
4. Test the Faucet
Turn on the hot and cold water:
Check for leaks around the aerator (if dripping, re-seat the washer or tighten slightly).
Verify water flow: It should be steady, even, and free of sputtering/air bubbles (the aerator mixes air with water for a smooth stream-this is normal).
Pro Tips for Maintenance
* Clean regularly: Clean the aerator every 1–3 months (more often in hard water areas) to prevent severe buildup.
* Replace worn parts: If screens are torn, washers are cracked, or plastic parts are brittle, replace the entire aerator (inexpensive-$5–$15 at hardware stores, match the faucet's thread size: standard is 15/16" or 55/64").
* Avoid harsh chemicals: Do not use bleach or abrasive cleaners-they can damage the faucet finish, rubber washers, or mesh screens.
* For persistent low flow: If cleaning the aerator doesn't fix flow, check the faucet's supply lines (under the sink) for kinks or sediment buildup in the shut-off valves.
This process takes 10–15 minutes and restores full water flow without needing a plumber-perfect for routine kitchen maintenance!