

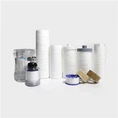
Changing a water filter cartridge is a routine maintenance task, and while the exact steps can vary slightly by brand and model (e.g., under-sink, whole-house, or refrigerator filters), the core process follows a standard, safe workflow. Below is a general, step-by-step guide for most common residential water filter systems, plus key safety and troubleshooting tips:
Preparations Before Starting
1. Gather Tools & Supplies
New replacement filter cartridge (match the model number of your old filter-critical for fit/function).
A bucket, towel, or absorbent cloth (to catch water spills).
Adjustable wrench or filter housing wrench (if needed for screw-on housings).
Lubricant (food-grade silicone grease, optional-for O-rings to prevent leaks).
2. Shut Off Water Supply
Locate the main water shut-off valve for the filter system (under the sink for under-counter filters, near the water heater for whole-house filters). Turn it clockwise to close.
For refrigerator water filters: No need to shut off the main water, but open the refrigerator's water dispenser to relieve line pressure (run until water stops flowing).
For under-sink systems: Open the filtered water faucet to drain remaining water in the lines and reduce pressure.
3. Note Filter Orientation
Before removing the old cartridge, check how it's installed (e.g., "in/out" flow arrows, top/bottom markings). Most filters are directional-installing backwards will block water flow or break the seal.
Step-by-Step Filter Replacement
1. Remove the Old Filter Cartridge
The removal method depends on the filter type:
* Twist-on (screw-in) cartridges (common in under-sink sediment/carbon filters):
Place a bucket under the filter housing to catch spills.
Use a filter housing wrench (or adjustable wrench) to grip the housing, turn counterclockwise to loosen, then unscrew by hand and lower the housing.
Dump out any remaining water in the housing, then pull the old cartridge straight out of the housing.
* Push-fit / Quick-connect cartridges (modern under-sink, refrigerator, or inline filters):
No tools needed-press the release buttons/clips on the filter housing/connector, then pull the old filter straight out. Some may have a small tab to lift for release.
* Whole-house big blue filters:
Follow the twist-on method (use a large filter wrench for the big housing), and ensure pressure is fully relieved before opening.
2. Inspect & Clean the Filter Housing (Critical for Twist-on Types)
* Check the O-ring/gasket (the rubber seal on the filter housing cap) for cracks, tears, dirt, or deformation. A damaged O-ring is the #1 cause of leaks-replace it if worn (most new filter kits include a spare O-ring).
* Wipe the inside of the filter housing with a clean, damp cloth to remove sediment, slime, or debris. Do not use soap or chemicals (they can contaminate filtered water).
* If reusing the old O-ring: Apply a thin layer of food-grade silicone grease to the O-ring to lubricate it-this ensures a tight seal and prevents sticking during reinstallation.
3. Install the New Filter Cartridge
* Match the orientation: Align the new cartridge with the flow arrows (marked on the filter/housing) pointing in the direction of water flow (usually "in" toward the water line, "out" toward the faucet).
* For twist-on housings: Insert the new cartridge straight into the housing, ensuring it sits firmly on the base (no tilting).
* For push-fit filters: Align the cartridge with the connector, then push firmly until you hear a "click" (confirms it's locked in place).
4. Reattach the Filter Housing / Secure the Cartridge
* For twist-on housings: Lift the housing back up to the cap, thread it on clockwise by hand first (to avoid cross-threading), then tighten gently with the wrench (only ¼–½ turn past hand-tight-over-tightening cracks the plastic housing or damages the O-ring).
* For push-fit filters: Double-check the release clips/buttons are fully engaged (no gaps around the filter).
Post-Installation: Flush & Test for Leaks
1. Turn the Water Supply Back On
Slowly open the main water shut-off valve (counterclockwise) to restore water flow. Avoid sudden full pressure to prevent damage.
2. Check for Leaks
Inspect the filter housing, O-ring, and all connections for drips or pooling water. If leaking:
Twist-on housings: Tighten the housing slightly more (if hand-tight only) or re-seat the O-ring.
Push-fit filters: Remove and reinsert the filter to ensure it's fully locked.
If leaks persist, replace the O-ring or check for a cracked housing.
3. Flush the New Filter (Essential)
New cartridges have air pockets, carbon dust, or manufacturing residues-flushing removes these and ensures clean water.
Under-sink systems: Run the filtered water faucet for 3–5 minutes (or 1–2 gallons of water) until the flow is steady and no air bubbles/black carbon dust come out.
Refrigerator filters: Dispense water from the fridge dispenser for 3–5 minutes (or 2–3 gallons) and discard the first few batches of ice (to remove carbon dust).
Whole-house filters: Run multiple faucets in the house for 5–10 minutes to flush the entire line.
4. Reset Filter Indicator (If Applicable)
Many modern systems (refrigerators, smart under-sink filters) have a filter life indicator light. After replacement, press and hold the "Reset Filter" button (usually on the control panel or filter housing) for 3–5 seconds until the light turns off or resets.
Key Safety & Best Practices
* Replace on Schedule: Follow the manufacturer's recommended timeline (typically 6–12 months for sediment/carbon filters, 12–24 months for RO membranes). Delayed replacement leads to reduced filtration, bacterial growth, or clogged lines.
* Use Genuine Cartridges: Avoid generic/knock-off filters-they may not fit properly, fail to filter contaminants, or leach chemicals into water.
* Do Not Mix Media: Only replace with the same filter type (e.g., sediment for sediment, carbon for carbon) unless the system is designed for multi-media swaps.
* For RO Systems: If replacing RO membrane or post-carbon filters, flush each stage separately (follow the system's manual-RO membranes may need longer flushing).
Troubleshooting Common Issues
* No water flow: Filter installed backwards, clogged new cartridge (rare), or air lock (run faucet longer to bleed air).
* Cloudy/bubbly water: Air trapped in the filter-continue flushing until clear.
* Black particles in water: Carbon dust from new carbon filters-normal, stops after flushing.
Always refer to your specific filter system's user manual for model-exact steps (e.g., unique locking mechanisms, flushing requirements), as some specialty systems (e.g., UV filters, multi-stage RO) have additional steps.