Replacing a shower filter cartridge is a simple and straightforward process that can help improve the quality of your shower water. Here is a step-by-step guide to help you replace your shower filter cartridge:
1. Turn off the water supply: Before you start replacing the filter cartridge, make sure to turn off the water supply to your shower. This will prevent any water from flowing while you are working on the filter.
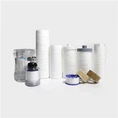
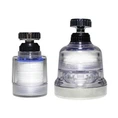
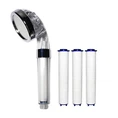
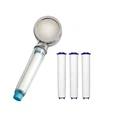
2. Remove the old cartridge: Depending on the type of shower filter you have, the cartridge may be located in different parts of the shower head or system. Locate the cartridge and carefully remove it from its housing. Some cartridges may twist off, while others may need to be unscrewed or pulled out.
3. Clean the filter housing: Once you have removed the old cartridge, take the time to clean out the filter housing. Use a clean cloth or brush to remove any build-up or debris that may have accumulated in the housing.
4. Install the new cartridge: Take your new filter cartridge and carefully insert it into the filter housing. Make sure it is securely in place and properly positioned.
5. Turn on the water supply: Once the new cartridge is installed, turn on the water supply to your shower. Check for any leaks or drips around the filter housing to ensure a proper seal.
6. Run the water: To flush out any initial debris or carbon fines from the new filter cartridge, run the water for a few minutes before using the shower. This will help ensure that you are getting clean and filtered water.
7. Enjoy clean water: With your new filter cartridge installed, you can now enjoy cleaner and fresher water every time you take a shower. Remember to replace your filter cartridge regularly as recommended by the manufacturer to maintain optimal performance.
By following these simple steps, you can easily replace your shower filter cartridge and ensure that you are getting the best quality water for your showering needs.
https://www.angefilter.com/