

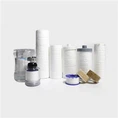
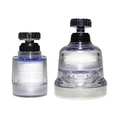
Installing a faucet-mounted water filter (the compact, direct-on-tap type for drinking/cooking water) is a simple DIY task-no plumber needed. It attaches directly to your standard kitchen faucet, diverts water through a filter cartridge, and delivers filtered water via a dedicated spout. Below is a step-by-step guide for most standard faucet filters (e.g., Brita, Pur, Culligan), plus compatibility checks and troubleshooting.
First: Check Faucet Compatibility
Faucet filters only work with standard threaded faucets-verify your faucet first to avoid issues:
1. Remove the existing aerator: The small mesh screen at the faucet tip (twist counterclockwise by hand).
2. Check threads:
✅ Compatible: Faucet has external male threads (most standard kitchen faucets-threads on the outside of the spout tip).
❌ Not compatible:
Pull-out/pull-down spray heads (no fixed threaded tip).
Faucets with internal female threads (threads inside the spout, rare for kitchen taps).
Non-standard, sensor, or commercial-style faucets (irregular tip size/shape).
3. Measure aerator size: Standard sizes are 15/16"-27 (male) or 55/64"-27 (male)-most filter kits include adapters for both.
Tools & Supplies You'll Need
* Faucet filter kit (includes filter unit, new cartridge, adapter set, washers).
* Towel (to catch small parts/water).
* Pliers (optional, wrapped in cloth-for tight aerators).
* Rag (to clean faucet threads).
Step-by-Step Installation Guide
1. Prep the Faucet
Turn off the hot/cold water valves under the sink (optional but safe-prevents accidental splashing).
Remove the old faucet aerator:
Twist counterclockwise by hand-most loosen easily.
If stuck: Wrap a cloth around the aerator (to protect the faucet finish), grip with pliers, and twist gently counterclockwise.
Clean the faucet spout threads: Wipe away mineral buildup, dirt, or old washer debris with a damp rag-clean threads ensure a tight, leak-free seal.
2. Attach the Adapter (If Needed)
Most faucet filters include thread adapters to fit different faucet sizes-match the adapter to your faucet's thread size:
Lay out the adapter set (usually 2–3 plastic/metal adapters + rubber washers).
Screw the correct adapter clockwise onto the faucet spout threads (hand-tight only-do not over-tighten).
For external male threads: Use the adapter with internal female threads (fits over the faucet tip).
Ensure the rubber washer is seated inside the adapter (prevents leaks).
3. Mount the Filter Unit
Align the filter unit's base with the adapter/faucet tip.
Twist the filter base clockwise onto the adapter until it's snug (hand-tight-no tools needed).
The filter should sit straight (no tilting) and the switch lever (for filtered/unfiltered water) faces outward for easy access.
Double-check the seal: Gently tug the filter-if it wobbles, tighten slightly more (stop before it's hard to turn).
4. Insert the New Filter Cartridge
Locate the cartridge compartment on the filter unit (usually a twist-off cap or pull-out tray on the bottom/back).
Remove the plastic wrapping from the new filter cartridge (do not rinse the cartridge-manufacturers pre-treat them for filtration).
Insert the cartridge into the compartment, following the directional arrows (marked on the cartridge/unit-most have a "top" label or notch for alignment).
Secure the compartment cap (twist clockwise or snap shut) until it clicks/seals tightly.
5. Prime & Flush the Filter (Critical Step)
New cartridges have air pockets, carbon dust, or manufacturing residues-flushing removes these and activates the filter:
Turn on the cold water faucet to full pressure.
Switch the filter lever to "Filtered" mode (water flows through the cartridge).
Let water run for 5–10 minutes (or until the water runs clear, with no black carbon particles or air bubbles).
Discard all flushed water-do not drink it.
Switch to "Unfiltered" mode and run water for 1–2 minutes to clear the faucet lines.
Turn off the faucet-your filter is ready to use.
6. Test for Leaks
Run both filtered and unfiltered water for 1–2 minutes:
Check for drips around the filter base/adapter/faucet threads.
If leaking: Unscrew the filter base, re-seat the rubber washer, and hand-tighten again (over-tightening cracks plastic parts-only tighten until snug).
Key Usage & Maintenance Tips
Switch modes correctly:
Use "Filtered" for drinking, cooking, or filling water bottles.
Use "Unfiltered" for handwashing, dish rinsing, or hot water (most faucet filters are not designed for hot water-high heat damages the cartridge).
Replace cartridges on schedule: Follow the manufacturer's timeline (typically 2–4 months or 100 gallons)-a worn cartridge reduces filtration and may harbor bacteria.
Clean the filter unit: Wipe the outside with a damp cloth monthly to remove soap scum or water spots.
Avoid hot water: Do not run hot water through the filtered mode-heat degrades activated carbon/KDF media and shortens cartridge life.
Troubleshooting Common Issues
No filtered water flow: Cartridge inserted backwards, air lock (flush longer), or clogged adapter-reinstall the cartridge correctly and flush for 5+ minutes.
Leaks at the base: Missing/worn rubber washer, cross-threaded adapter, or over-tightening-re-seat the washer and hand-tighten only.
Black particles in water: Carbon dust from the new cartridge-normal, stops after flushing.
Low filtered flow: Saturated cartridge (replace) or clogged adapter (clean with a toothpick).
This process takes 10–15 minutes and works for all standard faucet-mounted filters-always refer to your specific kit's manual for model-exact adapter sizes or flushing instructions!